

Fossicking for Tumbling Rocks in Australia: 2026 Guide
For finding rocks for tumbling australia, hardness, condition and suitability matter more than a stone’s bright colour or unusual shape. A promising-looking pebble still needs a closer look before it goes in a tumbler.
If you’re wondering where to look and how to tell worthwhile rough from a stone that may disappoint in the barrel, start with a few practical checks. It’s easy to collect pieces that turn out to be cracked, too soft or a poor match for the rest of a batch. A tempting creek, beach or bush track isn’t automatically a place where collecting is allowed.
This guide explains how to find promising stones in accessible places where collecting is permitted, make a first assessment and sort your finds before tumbling. You’ll learn what to look for in the field, how a steel nail can help you check hardness, and why rocks with similar hardness are generally better suited to the same batch. Rules vary with land tenure and state or territory, so check the requirements before collecting. You’ll also learn when to leave a stone behind and when buying rough material may be a better option.
Key Takeaways
- Before finding rocks for tumbling australia, check whether collecting is allowed on the specific land you plan to visit.
- Use hardness, surface texture and visible cracks as clues. A visual check is a first filter, not a promise of a polished result.
- Collect sparingly, handle sharp or freshly broken rocks with care, and label finds so you can sort them later.
- If a stone’s identity, condition or suitability for a batch is uncertain, research it before collecting more.
- Follow your tumbler’s instructions and use suitable supplies when you’re ready to process suitable finds.
Where to Fossick for Tumbling Rocks in Australia
Suitable rough can turn up in natural settings, but an interesting-looking pebble isn’t an invitation to take it. First establish who manages the land and whether collecting is allowed. Rules differ across Australia, and a place that looks open or accessible may still be protected or subject to restrictions.
In Australia, fossicking generally means searching for and collecting rocks, minerals or gemstones. The overview of Fossicking in Australia offers useful background, but it doesn’t replace checking the current rules for the exact place you plan to visit.
Which Australian landscapes might reveal tumbling rough?
Where collecting is expressly permitted, exposed gravel deposits and naturally moved stones can make it easier to scan for interesting shapes, colours and textures. Gravel bars, eroded surfaces and other patches of exposed ground may reveal stones that are harder to spot beneath vegetation or loose soil. Treat these settings as places to look, not a guarantee of suitable finds. Each stone still needs to be checked for condition and tumbling suitability.
How can you check whether collecting is allowed?
On private land, ask the landholder for permission before collecting. On public or protected land, check with the relevant land manager before you go. Access and collecting rules vary with land tenure and state or territory, so don’t assume a beach, waterway, park or roadside verge is open to fossicking just because stones are visible there.
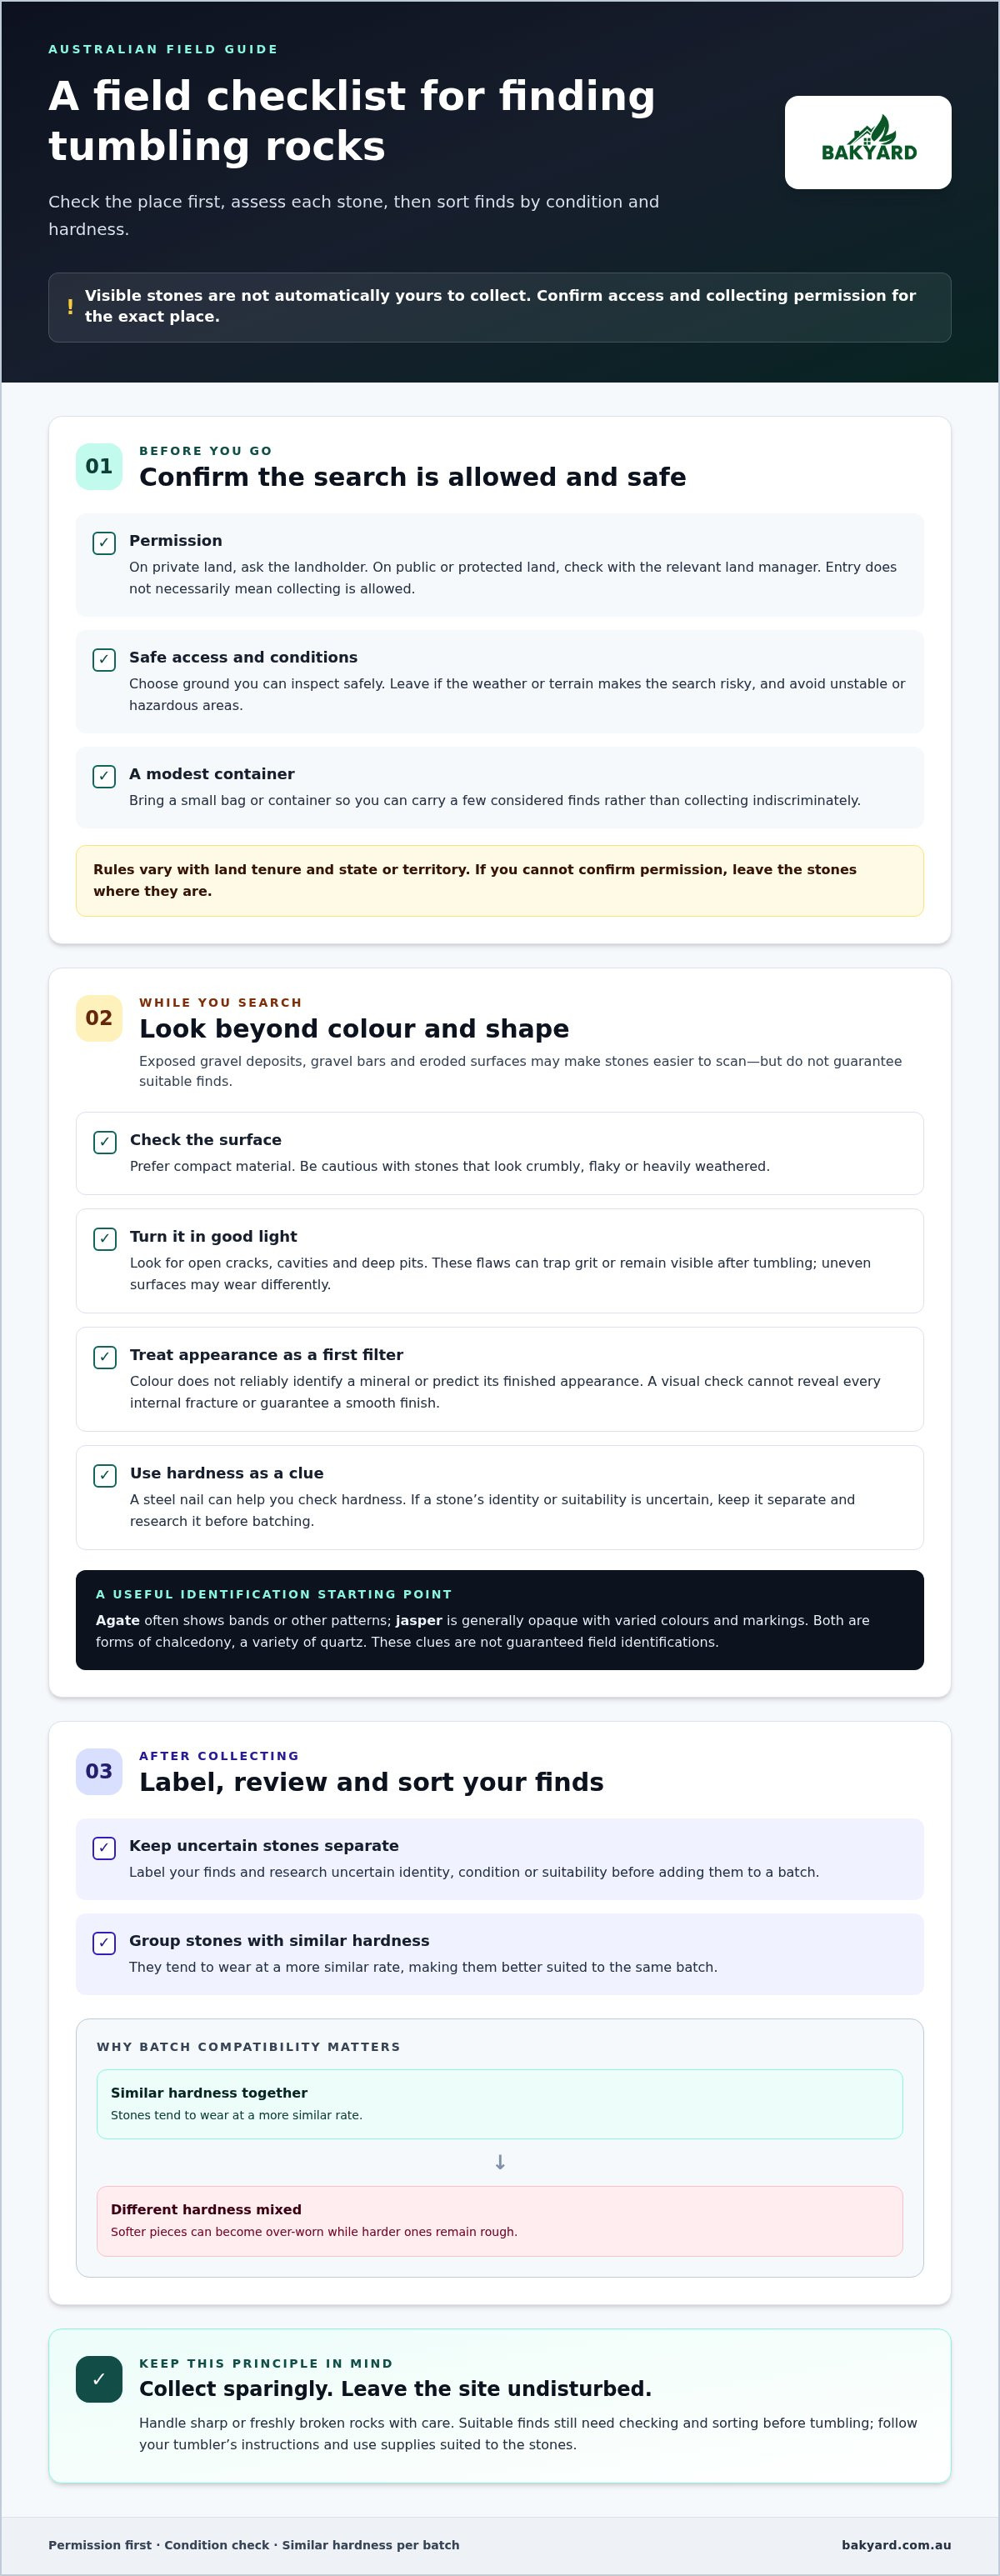
Use this field check before setting out:
- Permission: Confirm that collecting is allowed, not just entry.
- Safe access: Choose a place you can reach and inspect without stepping onto unstable ground or entering hazardous areas.
- Suitable conditions: Look for clear visibility and conditions that let you move around safely. Leave if weather or terrain makes the search risky.
- Small container: Bring a modest bag or container so you can carry a few considered finds instead of collecting indiscriminately.
For finding rocks for tumbling australia, start with a permitted, safe search area, not simply the nearest patch of gravel. If you can’t confirm access or collecting permission, leave the stones where they are and choose another place. A little preparation makes each find more rewarding and helps keep the landscape in good shape for others.
How to Spot Rocks That May Be Worth Tumbling
A promising tumbling stone usually feels solid and holds together under close inspection. Hardness, surface texture and hidden fractures all affect how a rock behaves in a batch, so colour and shape are only starting clues. Visual screening can help you decide what to examine further, but it can’t guarantee a smooth finish.
What surface clues can help you assess a stone?
Look for compact material rather than a crumbly, flaky or heavily weathered surface. Turn the stone in good light and check for open cracks, cavities and deep pits. These flaws can trap grit or remain visible after tumbling, while uneven surfaces may wear differently from the rest of the stone. A quick look won’t reveal every internal fracture, so treat suspicious pieces cautiously.
Colour can be appealing, but it doesn’t reliably identify a mineral or predict its finished appearance. Stones with similar colours may have different compositions and hardnesses. If you’re unsure what you’ve found, keep it separate and research it before adding it to a batch.
How do agate, jasper and quartz differ as finds?
Agate and jasper are forms of chalcedony, a variety of quartz. Agate often shows bands or other patterns, while jasper is generally opaque and can have varied colours and markings. Quartz is a mineral that appears in different forms. Petrified wood is another example worth researching. It formed as mineral material replaced or filled the structure of wood over time. These names are useful starting points, not guaranteed field identifications or promises of local availability.
Rocks with similar hardness are better suited to the same batch because they tend to wear at a more similar rate. Mixing stones that behave differently can leave softer pieces over-worn while harder ones remain rough. For beginner context on the tumbling process, see this Australian rock tumbler guide.
For finding rocks for tumbling australia, build a small, sorted collection rather than relying on appearance alone. Label uncertain finds and check their identity and condition before batching. Permission matters too. Review the official state fossicking rules as an example of how requirements can vary by location and land status.
Once you’ve screened and sorted suitable finds, the Bakyard Professional Electric Rock Tumbler Kit is one option for processing them. Follow the tumbler’s instructions and use supplies suited to the stones you’ve chosen.
How to Collect Tumbling Rocks Responsibly and Sort Them
A thoughtful routine helps protect the places you visit and makes your finds easier to assess later. Collect only where it’s permitted, take a small selection of loose stones, and avoid disturbing plants, habitats or landforms. Rules differ across land tenures and state or territory, so check requirements with the relevant land manager before your trip.
Get permission first, collect sparingly and leave the site as undisturbed as you can. That’s a useful principle for fossicking across Australia’s varied landscapes.
What should you take on a rock-finding trip?
Keep your kit light: bring a small container, labels, a notebook and protective gloves. Eye protection is sensible when handling sharp or freshly broken rock. Leave heavy tools at home unless their use is expressly permitted and you can use them safely. Don’t strike or break rocks just to see what’s inside.
Use this simple field routine:
- 1. Confirm access. Check that both entry and collecting are allowed for the specific site.
- 2. Inspect safely. Watch your footing, avoid unstable ground and handle sharp edges with care.
- 3. Collect sparingly. Choose only a few loose stones you have permission to take. Leave uncertain or fragile material in place.
- 4. Label and note. Keep finds separate, label them and record the general setting, such as exposed gravel or a dry creek bed. Avoid sharing sensitive location details publicly.
How should you prepare and sort finds at home?
Rinse off loose dirt carefully, then let the stones dry before inspecting them in good light. Water can temporarily make colour and patterns look stronger, so assess dry stones too. Set aside pieces with obvious cracks, soft or crumbly areas, cavities or mixed-looking material for further checking rather than adding them straight to a batch.
Sort the remaining rough by apparent type and size, and keep anything you can’t confidently identify apart. Similar-looking stones can differ in hardness and composition, so don’t assume they belong together. A brief label such as “banded, hard, no obvious cracks” gives you a useful record without claiming more certainty than you have.
Once your finds are clean, assessed and sorted, decide whether they’re suitable for tumbling. For the next step, explore the Bakyard Professional Electric Rock Tumbler Kit and follow the tumbler’s instructions for your selected material.
How to Decide Whether a Found Rock Is Worth Keeping
A good find needs to pass more than the “looks interesting” test. Before putting a stone in your bag, consider four things: are you allowed to take it, is it in sound condition, do you have a reasonable idea what it is, and could it be sorted with compatible material? If one answer is uncertain, pause rather than collecting more.
When should you keep, research or leave a rock?
- Keep: Collect a modest sample only when removal is permitted and the stone appears solid, without obvious damage that makes it a poor candidate. Keep it separate until you’ve assessed what it is and what else might suit the same batch.
- Research: Set a stone aside if its identity is unclear, it has cavities or cracks, or its texture suggests it may be softer or more fragile than your other finds. A quick visual check can’t confirm its properties. Compare reliable references or seek knowledgeable advice before deciding whether to tumble it.
- Leave: Don’t remove a stone if permission is uncertain, the land is protected, or taking it would disturb the site. Leave damaged or fragile material too if collecting it could cause further harm.
Batch compatibility matters as well. Stones with very different hardness or durability may wear at different rates, so avoid mixing them just because their colours look alike. Keep uncertain pieces apart until you can identify them more confidently. There’s no need to force every find into a batch.
What if you cannot find suitable rocks nearby?
Local finds vary, and some areas may not offer material that’s suitable or available to collect. Buying rough stones is another option if permitted finds are scarce or don’t meet your needs. Before purchasing a mixed selection, read its description carefully. Check what types of stone it may include and whether the material is identified or variable, then consider how much sorting and research you’ll need to do.
Compare purchased rough with your own finds by identification, visible condition and sorting effort, rather than assuming either will produce a particular finish. The same careful screening applies: inspect each stone, separate uncertain material and avoid combining rocks that may behave very differently. This is a practical approach to finding rocks for tumbling australia, whether you’re assessing one field find or a mixed selection.
When your material is ready to process, the Bakyard Professional Electric Rock Tumbler Kit is one option. Follow its instructions for the rocks you choose.
From Australian Rock Finds to Your First Tumbling Batch
Finding a promising stone is only part of the process. Before it goes near a tumbler, make sure it was collected with permission, inspect it for damage, clean it and decide whether it belongs with the other stones you’ve selected. Care at this stage helps you avoid loading a batch with unsuitable or unidentified material.
What should you check before loading a batch?
Work through a final check for every stone. Rinse away loose dirt carefully and let the rock dry so you can examine its surface. Look again for cracks, cavities, soft or crumbly areas and signs that it may contain different materials. Separate visibly damaged stones and anything you can’t identify with reasonable confidence instead of assuming it will polish well.
Sort the remaining rocks by their likely material, hardness and size. Similar-looking stones aren’t necessarily alike, so keep uncertain finds aside until you’ve researched them. Choose supplies suited to your material, and follow the tumbler manufacturer’s instructions for loading and operation. Don’t rely on a general routine from another rock or machine. Use the guidance provided for your own equipment.
What is a sensible next step for a beginner?
Keep a simple record as you go. Note where permitted finds came from in general terms, how you identified them and which stones you grouped together. This gives you something to refer back to if a batch behaves differently than expected and helps you make more informed choices with future finds. Avoid sharing sensitive collection locations publicly.
If you’re still getting to know the hobby, Bakyard’s rock tumbling beginner’s guide offers broader context. Finding rocks for tumbling australia can take patience, and not every find needs to make it into a barrel. Careful screening and sorting are useful skills to build before you begin.
Once you’ve chosen clean, sound and compatible rough, the Bakyard Professional Electric Rock Tumbler Kit is available for the next step. Take your time, follow its instructions and learn from each batch.
Turn Your Finds into a Thoughtful First Batch
Great tumbling starts before a stone reaches the barrel. Check that collecting is allowed at your chosen site, then look for sound, promising pieces rather than gathering rocks simply because they catch your eye. At home, clean, inspect and sort your finds, keeping uncertain or visibly damaged stones separate. Similar-looking rocks may not suit the same batch, so take time to identify them and follow your tumbler’s instructions.
This careful field-to-barrel approach makes finding rocks for tumbling australia more rewarding and helps you collect with respect for the places you visit. If local finds aren’t suitable, rough material is another option. Check what it contains and sort it thoughtfully.
Ready to process suitable finds? Explore the Bakyard Professional Electric Rock Tumbler Kit and build your skills one carefully chosen stone at a time.
Frequently Asked Questions
Where can I find rocks for tumbling in Australia?
Look for suitable loose stones in exposed gravel deposits or areas where natural movement has brought rocks to the surface, but collect only where it’s expressly permitted. A beach, riverbank or patch of exposed ground isn’t automatically open to collecting. Check the land status and current rules before setting out, then focus on safely accessible spots where you can inspect stones without disturbing the surrounding environment.
Is it legal to collect rocks from public land in Australia?
Sometimes, but public land doesn’t automatically mean you can take rocks. Rules depend on the land’s tenure, its manager and the state or territory. Removing stones from national parks is generally illegal without a permit, and other public areas may also restrict collecting. Before you go, check the current rules with the relevant land manager and state or territory authority. If permission isn’t clear, leave the rocks where they are.
Can you tumble rocks found on a beach or beside a river?
Some beach or river stones may be suitable for tumbling, but first confirm that collecting is allowed at that specific site. Beaches and waterways can be privately owned, protected or managed under rules that restrict removal. Prioritise safe access too: avoid unstable banks, slippery rocks and rising water. If you’re permitted to collect, choose a few loose stones, then assess their condition and keep different-looking material separate for sorting at home.
How do I know if a rock is suitable for tumbling?
Start with a close look and feel. A compact, solid stone with no obvious cracks, cavities or crumbly patches is more promising than a heavily weathered or damaged one. Hardness matters too. As a rough guide, a stone that resists scratching with a steel nail may be worth researching further. This isn’t a guarantee of a good polish, so identify uncertain material and sort stones by likely compatibility before batching.
What Australian rocks are good for tumbling?
Agate, jasper and quartz are useful examples to research, along with petrified wood. They aren’t guaranteed to be available near you, and appearance alone won’t confirm a stone’s identity or suitability. Similar-looking finds can differ in hardness, durability and condition. Identify a stone before tumbling it, and group only material that’s likely to behave similarly. Leave damaged or uncertain pieces aside until you know more.
Should I wash rocks before putting them in a tumbler?
Yes. Clean off loose dirt before loading rocks so you can inspect their surfaces properly and avoid carrying grit into your batch. Rinse them carefully, then let them dry. A wet stone can look brighter or show patterns more clearly, so check it again once dry. Look for cracks, cavities and crumbly areas, and set aside stones that need more research instead of assuming washing makes them suitable for tumbling.
What should I do if I cannot find rocks for tumbling near me?
If permitted local finds are scarce or unsuitable, buying rough material is another option. Read the seller’s description carefully to understand what types of stone may be included and whether the mix can vary. Inspect and sort purchased stones just as you would field finds, checking identification, condition and likely batch compatibility. Finding rocks for tumbling australia can take patience, so there’s no need to collect unsuitable stones just to fill a batch.